Post a QR code
By embedding a QR code in a document, you can immediately see whether you're working with the most recent version of that document.
Written By Rico van der Stelt
1. Insert a QR code
Select a PDF file.
Click Add.
Click Add QR Code.
Drag the QR code to the desired location in the document.
Click "Stamp QR Code."
💡 Tip: Select multiple documents to add a QR code to them all at once.
In the document overview, you’ll now see a black QR icon indicating that a QR code has been added.
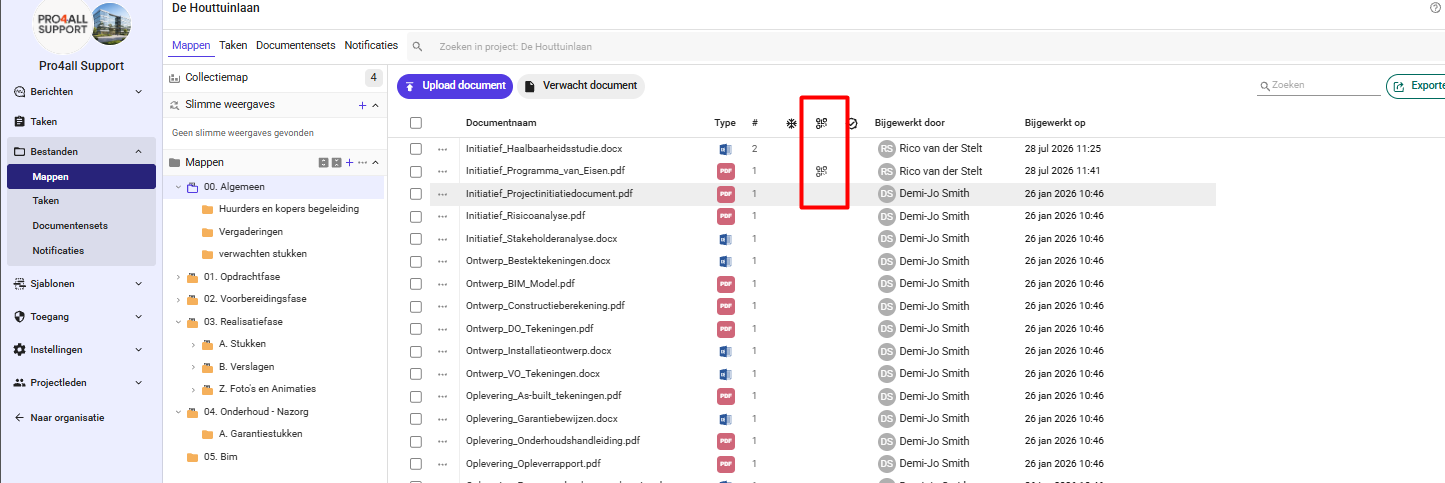
💡 Tip: Is the QR code grayed out? That means the code was only added to an older version.
2. Remove a QR code
Select the document.
Click Add.
Click Add QR Code.
Select "Revoke QR Code."
3. Scan QR code
When you scan the QR code, you’ll see a green or red screen, depending on whether it’s the latest or approved version.
4. Automatically approve or finalize a document after adding a QR code
Do you want a document to be automatically approved or finalized after a QR code is added? Configure this in the project’s document settings.
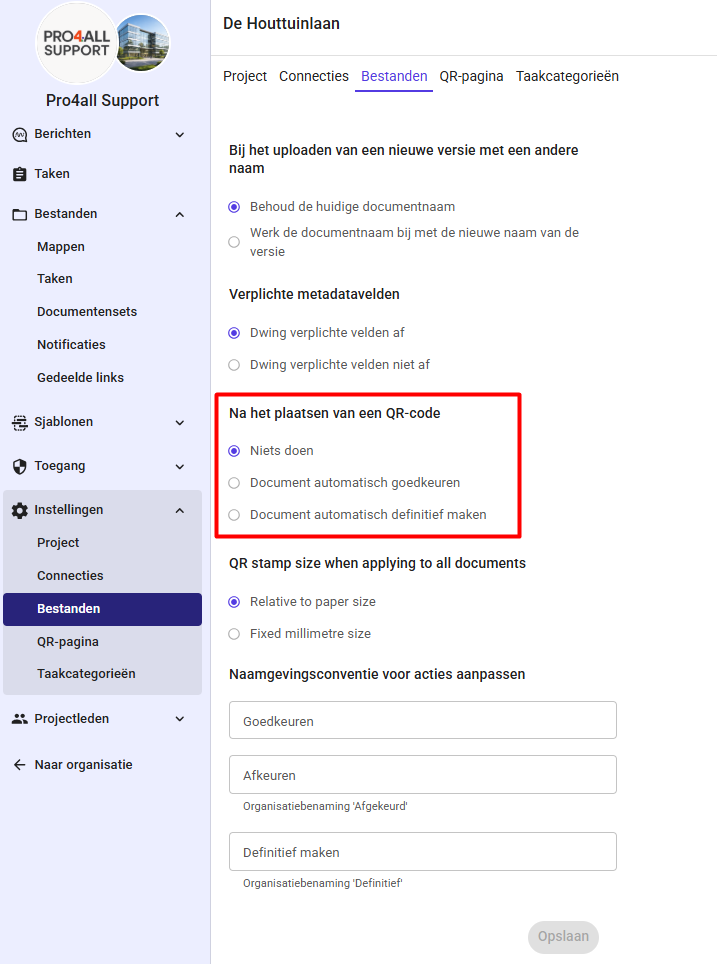
Go to the project settings.
Select "Files,"
Under “After placing a QR code,” select one of the following options:
Do nothing (default) — Prostream only places the QR code.
Automatically approve document — Prostream approves the version with the QR code.
Automatically finalize document — Prostream finalizes the document after placing the QR code.
⚠️ Note: Prostream always adheres to folder permissions. If you don’t have permissions to approve or finalize a document in a folder, Prostream will still place the QR code but will skip the automatic step.
💡 Tip: Only project administrators can change this setting.
Was this helpful?
Still need help? Ask the team