Document Sets
With document sets, you can create fixed collections of files or specific versions of those files. You can easily share a set with both Prostream users and people outside of Prostream. Lock a set to prevent further changes to its content. The log always shows you exactly what has happened to a set.
Written By Rico van der Stelt
1. Create a document set
Go to Document Sets under Files.
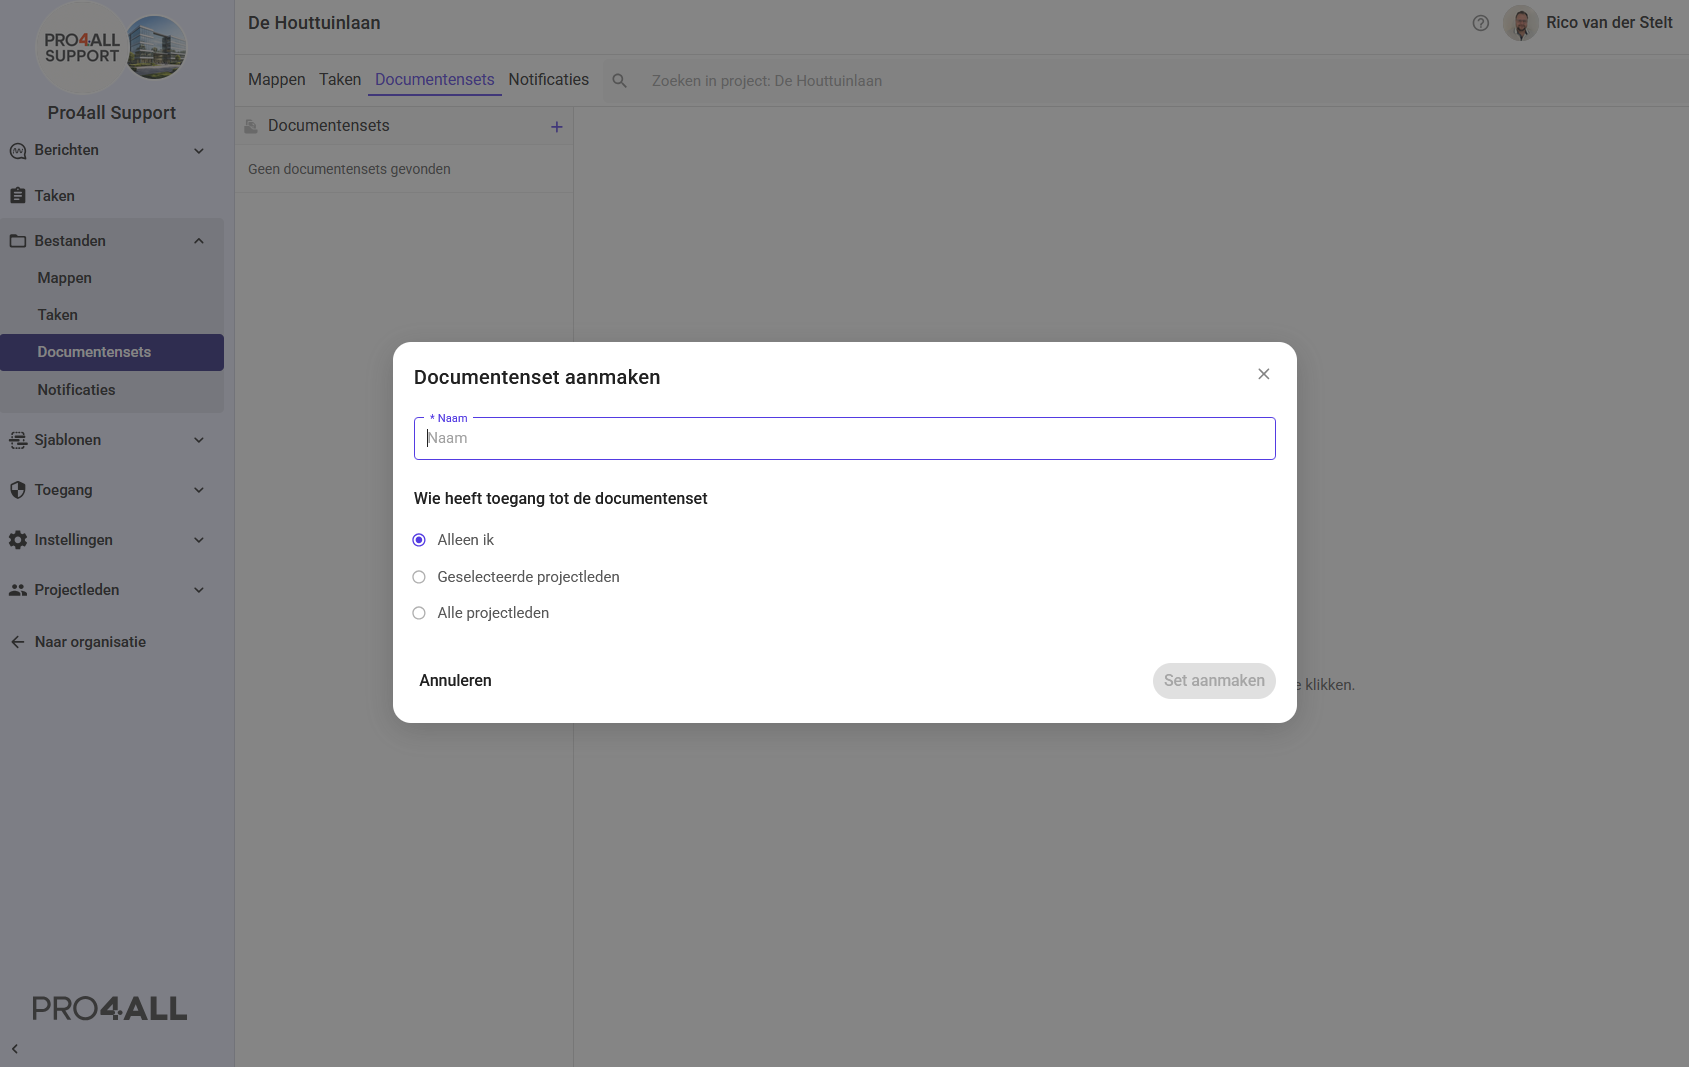
Click + to create a new set.
Choose who can view the set:
Only yourself
Selected project members
Everyone in the project
💡 Tip: If you choose "Everyone in the project," you can also enable "Exclude external members." This limits access to members of your own organization.
2. Add documents
Select a file from your file list.
Click Add → Add to document set.
Select the set you want to add the document to, or create a new set.
💡 Tip: By default, the latest version of a file is added. Want to add an older version? Open that version via the version management panel at the bottom of the screen and select “Add to document set.”
3. View a document set
Select a document set to view its contents. You can search within the set, view document details, and perform available actions.
Was a document deleted? It will remain visible in the set but will be displayed as disabled. This can happen when the version itself or the document container has been deleted. Hover over the disabled row to see who deleted it and when.
💡 Tip: Document sets include a history view that lets you see changes to the set over time.
4. Sharing a document set
Select all documents in the set and click Share.
Create a link and enter the expiration date.
Optionally, add a password for extra security.
Click Next. The link (and password, if applicable) have now been created.
Copy the link and the password separately.
⚠️ Note: A document link is valid for up to 20 years. Copy the password and the link immediately after creating them—you won’t be able to do this later. It’s not possible to copy both at the same time.
5. Locking a document set
Go to Document Sets.
Select the document set.
Click the three dots.
Select Lock.
A locked set clearly shows who locked it and when. No more documents can be added or removed.
💡 Tip: You can also unlock a locked set using the same three dots.
6. Removing Documents from a Set
Documents can be removed from a document set without deleting the original version or document container.
Go to Document Sets.
Select the document you want to delete.
Click the three dots.
Select "Remove from Document Set."
7. Delete a document set
Go to Document Sets.
Select the document set you want to delete.
Select "Delete."
💡 Tip: You can only delete your own document sets.
💡 Tip: Deleting a document set does not delete the original document versions. Versions and document containers remain available in their original locations.